After completing this lesson, you'll be able to:
In this lesson, you will:
After completing this lesson, you'll be able to:
In this lesson, you will:
If you're taking a live Safe Software-hosted training course or using an on-demand lab for this course, we've already imported the content for this lesson into your FME Flow.
If you're completing this lesson with your own FME Flow, you must import the starting project with the content into your FME Flow.
See FME Flow Authoring: Instructions to Import the Starting Project for directions to import the project to your own FME Flow.
Schedules let you run a workspace on FME Flow at specific future times. You can configure a schedule to run your workspace once at a particular time or repeatedly on an interval. Once you create and enable a schedule, the FME Flow Core ensures that the workspace runs at the correct future time. When a scheduled time occurs, the Core sends the workspace to the FME Flow Engines for processing.
You can run a workspace on a schedule with Automations in FME Flow, which you will learn about in the next lesson. The main advantage of using Automations to create scheduled workflows is the ability to use multiple workspaces and external actions. In contrast, Schedules limit you to running only one workspace and to running it only once in the future.
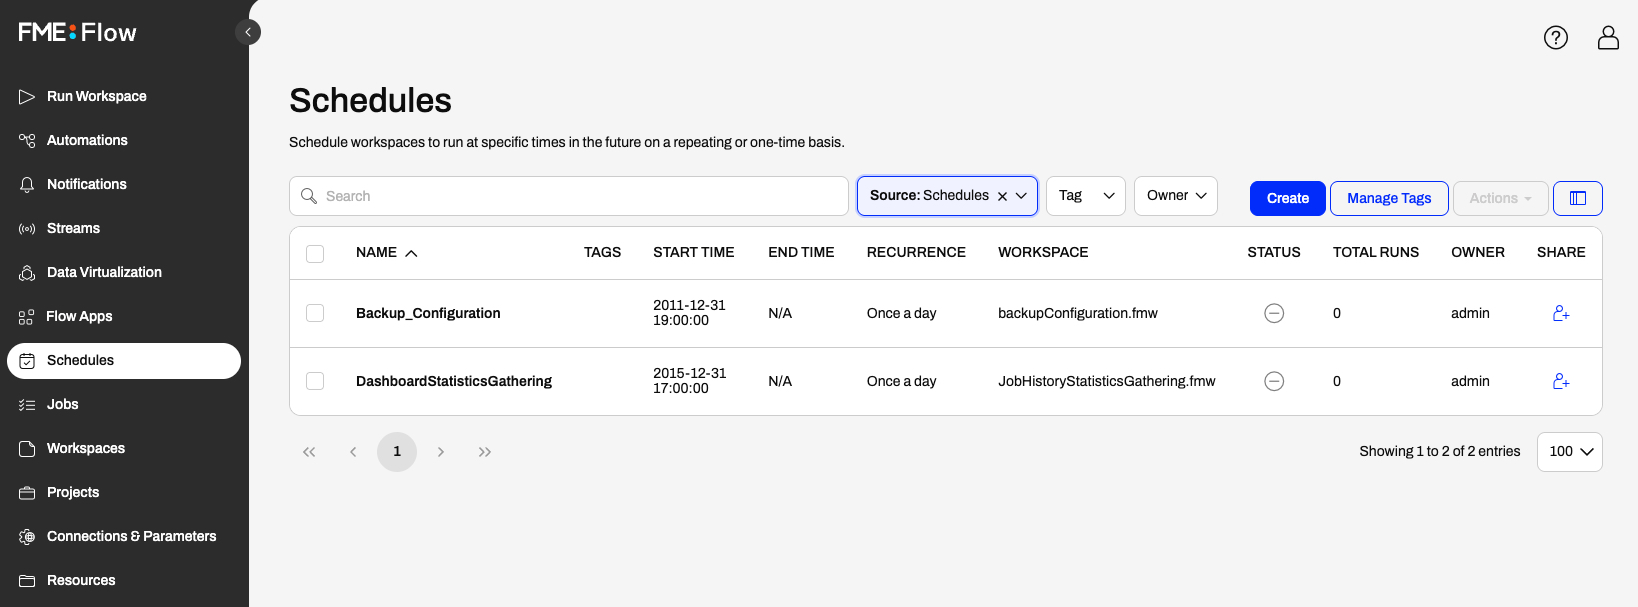
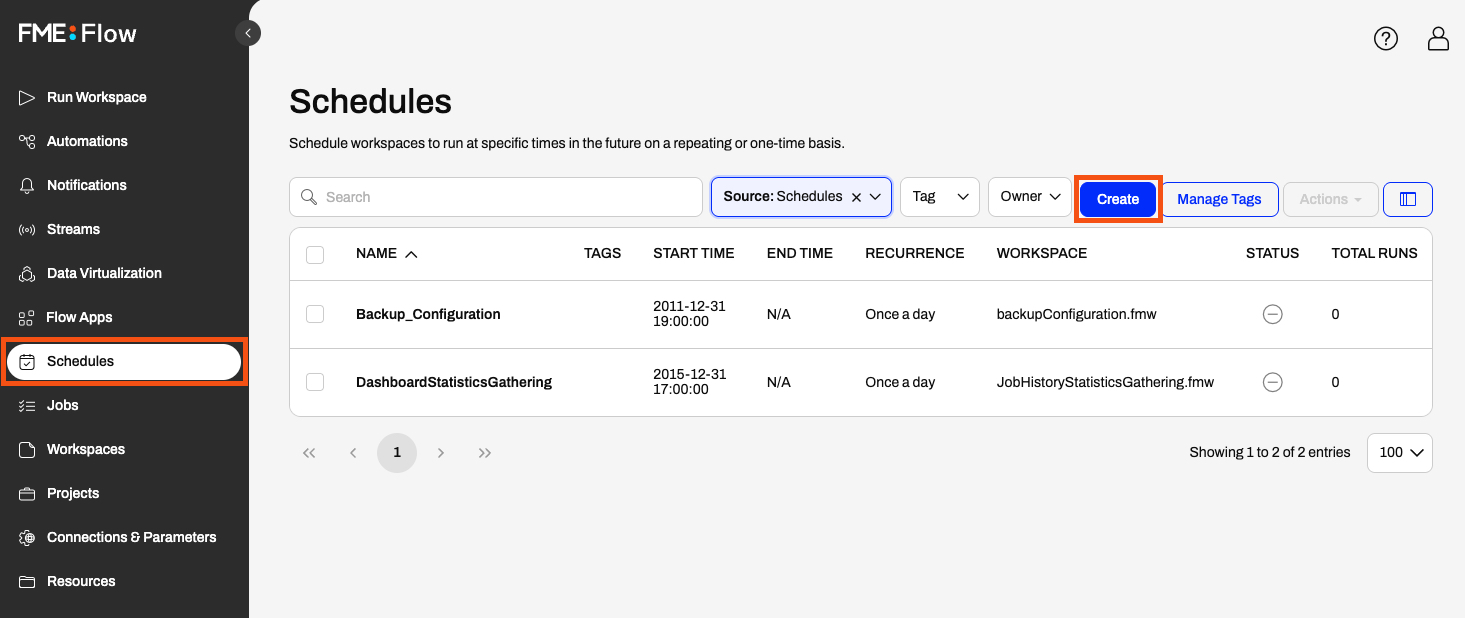
The Schedules option on the side menu opens a list of Schedules on your FME Flow.
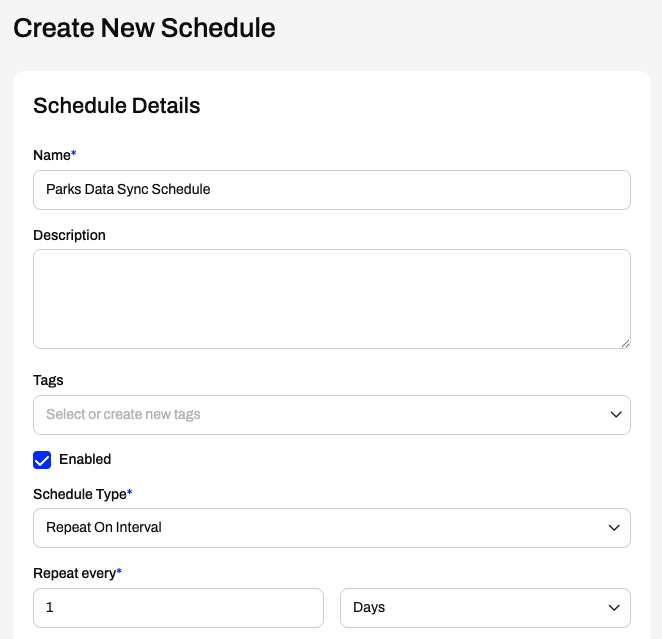
The Create option opens a form where you can choose your workspace to run and set the schedule type and interval.
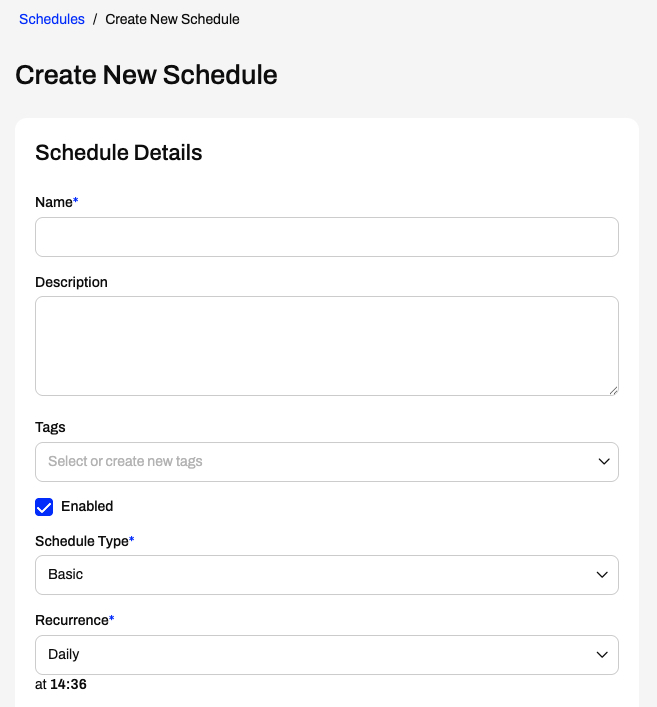
You must name your schedule and, optionally, provide a description and tags.
The Enabled option determines whether it runs on the schedule you configure as soon as you finish creating it. If you do not select Enabled, FME Flow creates the schedule but will not actively run the workspace until you enable it.
Next, you configure the Schedule Type, which sets when and how often your workspace will run in the future.
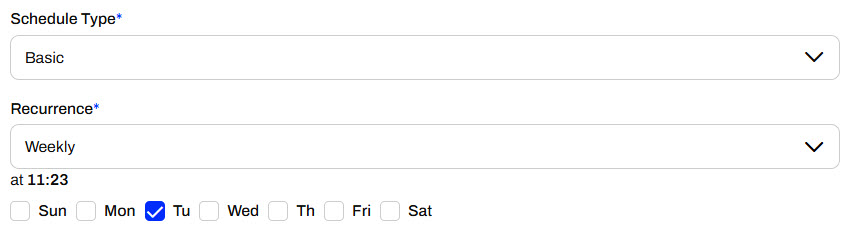
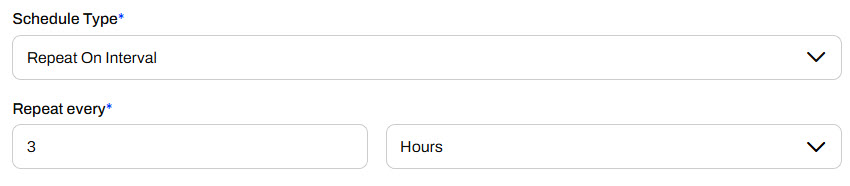
There are four different schedule types that you can set for Schedules. Click on each section to learn about each option.
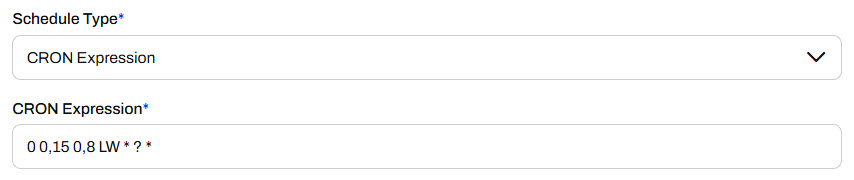
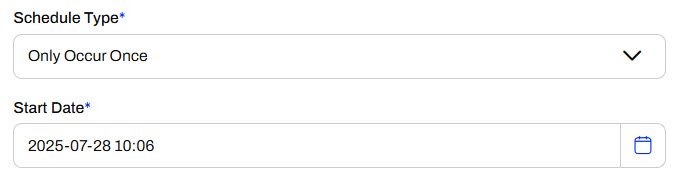
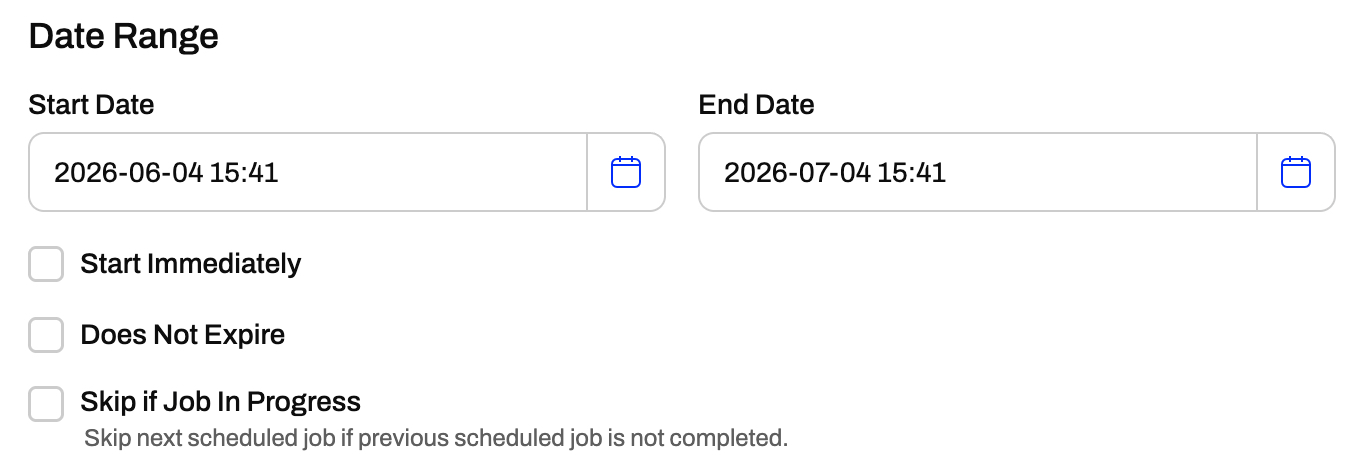
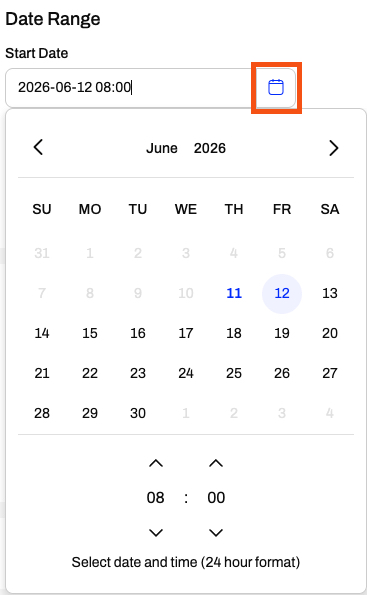
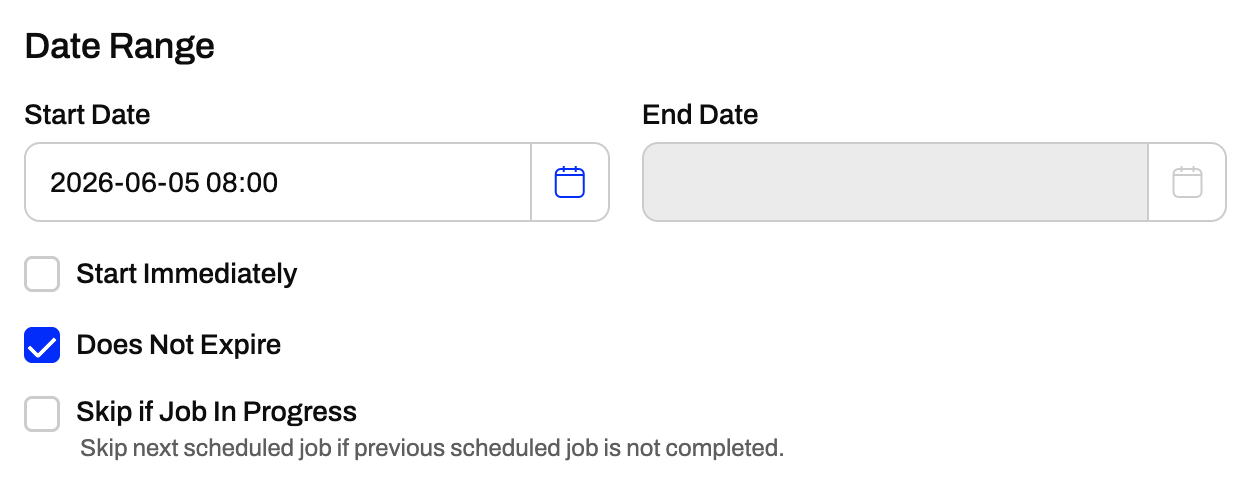
The date range section allows you to define start and end dates and times for FME Flow to run the schedule for all Schedule Types except Only Occur Once. Enter the date and time when the workspace should start running, and optionally enter a date and time when FME Flow will stop running the schedule. You can select Start Immediately to trigger the schedule immediately after you finish creating it. Likewise, you can choose the Does Not Expire option if you want the schedule to continue to run until you manually stop it.
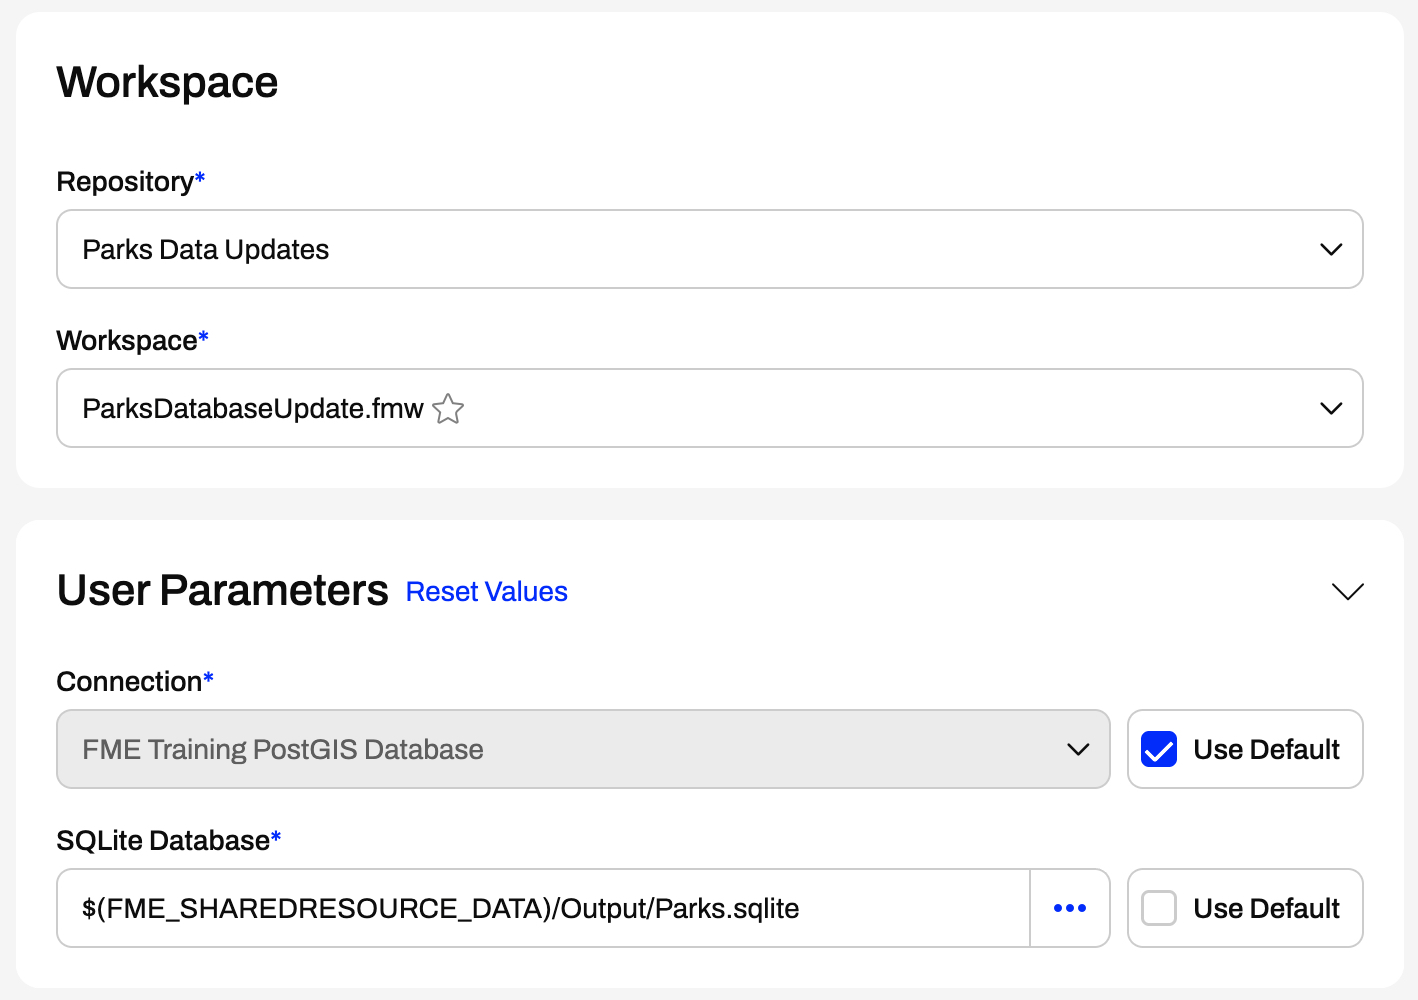
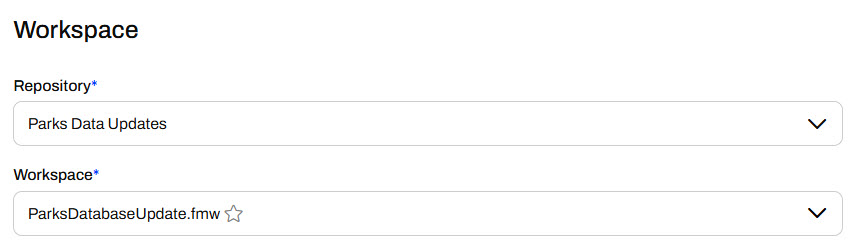
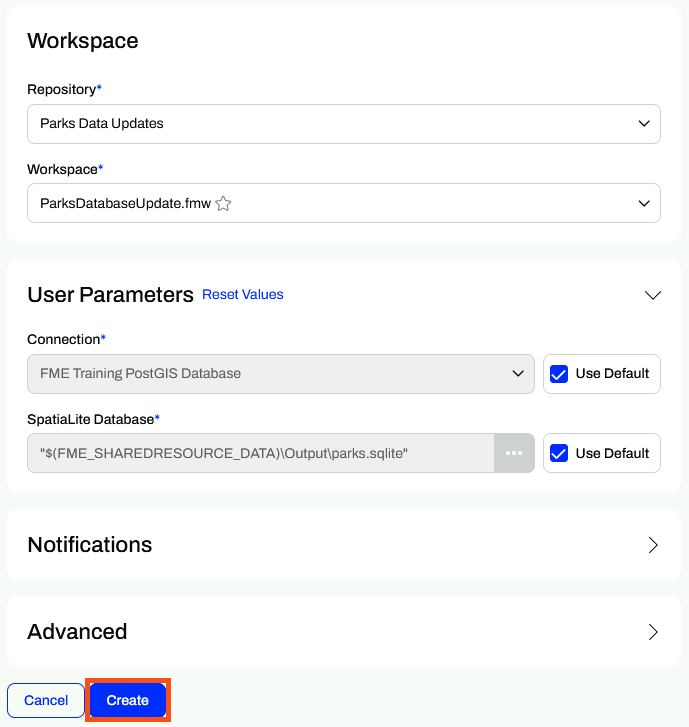
To set the workspace you want to run on the schedule, select the repository that contains the workspace, then select the workspace itself. If the workspace has any User Parameters, a new section will appear to configure the parameter values the workspace should use when it runs. FME Flow automatically selects the Use Default option for the parameters. You may deselect it and configure a different parameter value.
For more information on Parameters, see Build Self-Serve Workflows with Parameters and Create Flexible Workspaces with Parameters.
The last two sections are optional for you to configure. Notifications allow you to select a Topic to which FME Flow sends a message after the workspace translation completes. The Advanced section includes Job Queue control, expiry times, and a Log Debug mode option.
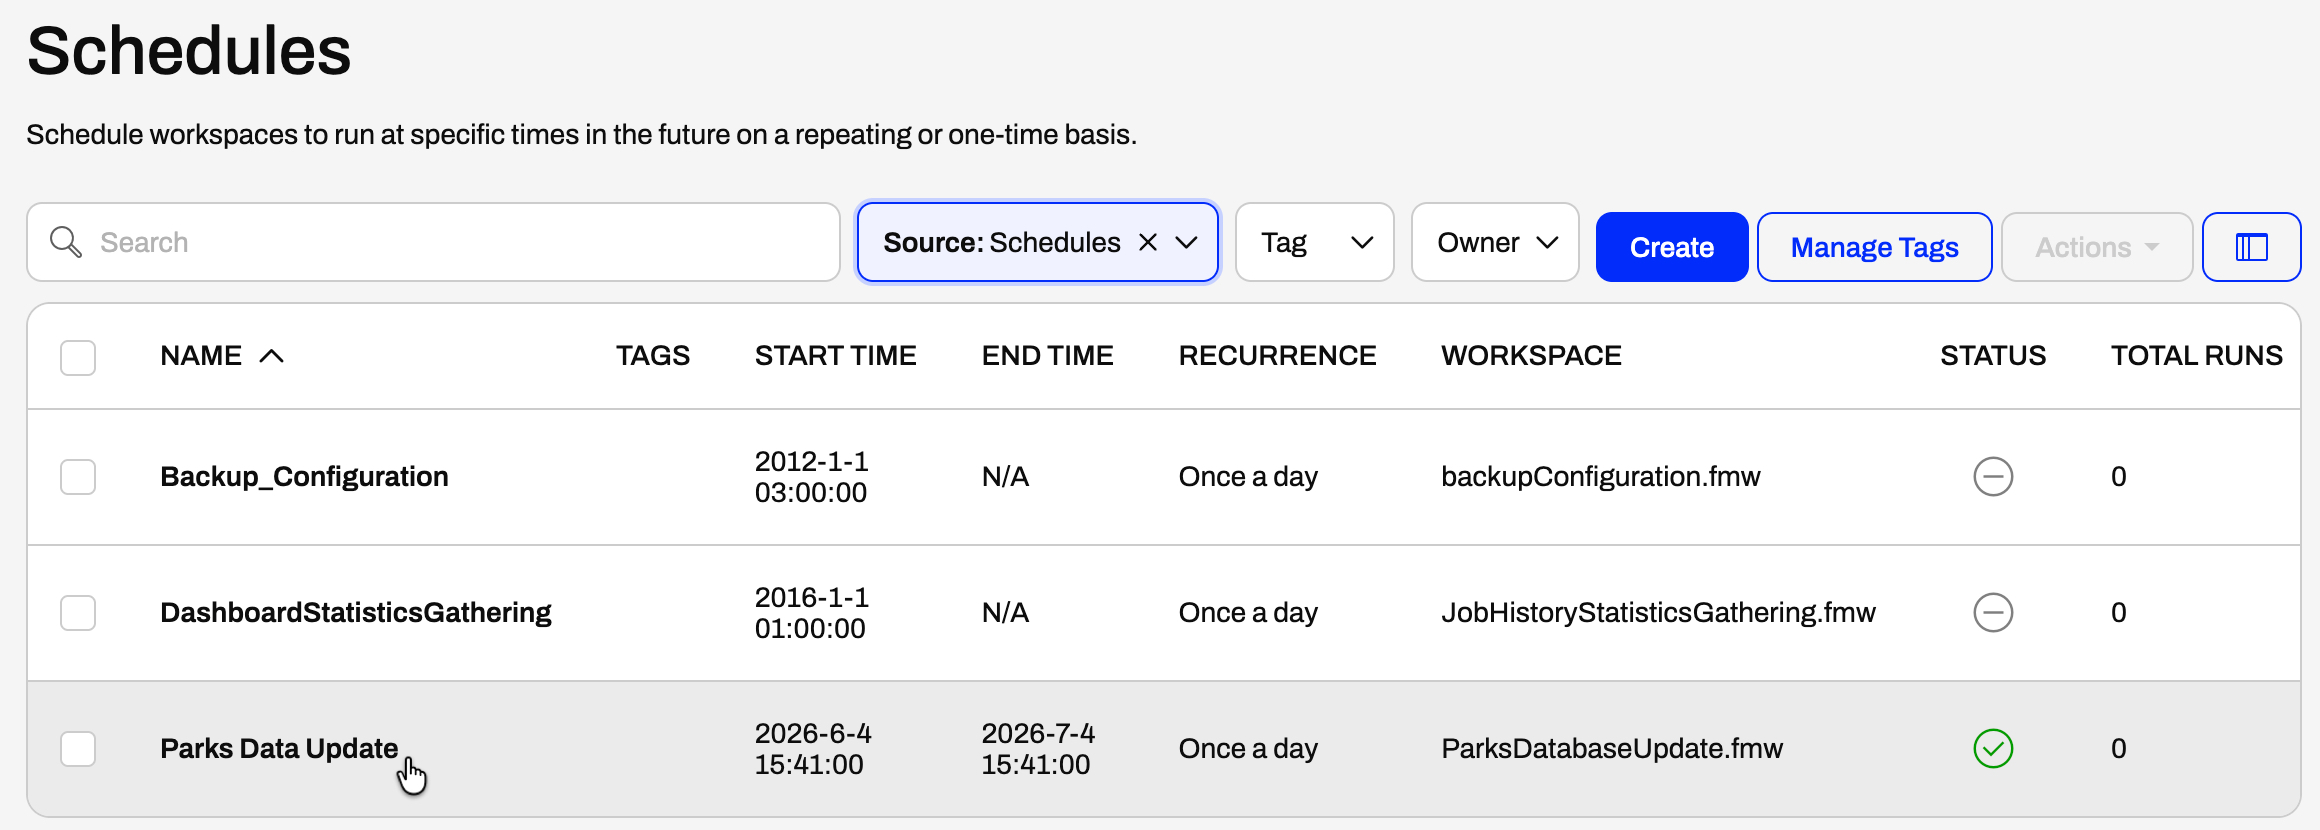
Once you create your schedule, you can view it on the Schedules page.
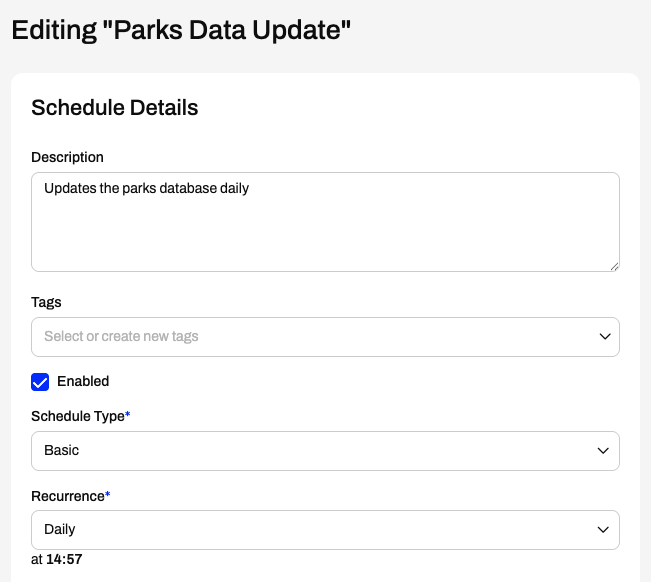
If you need to edit the schedule, click it on the Schedules page. You can edit all schedule settings except the schedule name.
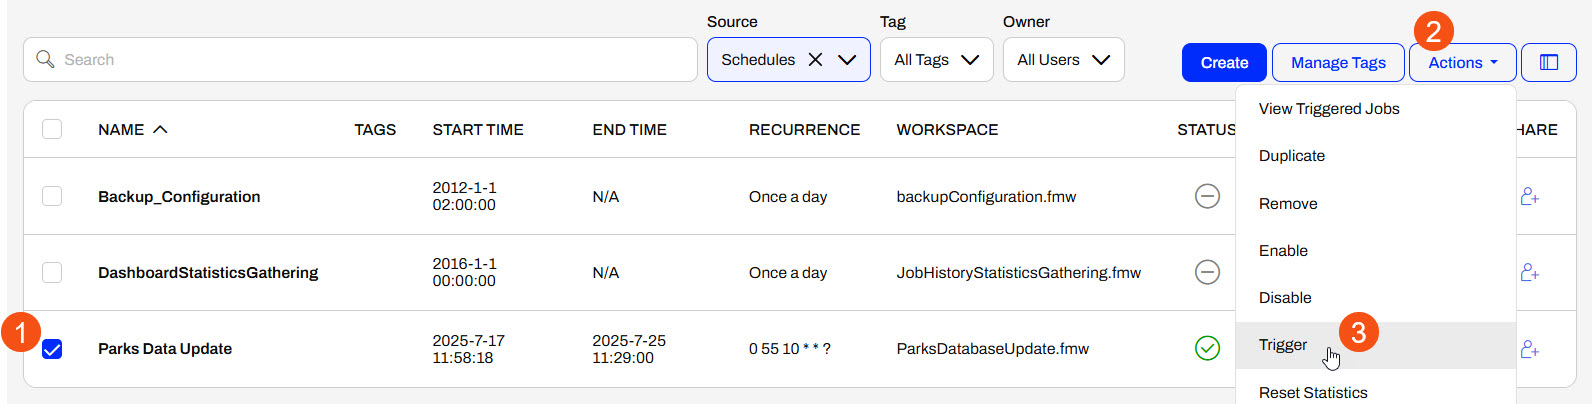
You may test your schedule before FME Flow triggers it, giving you greater confidence that the workspace will run as expected. From the Manage Schedules page, click the box to select your schedule, expand the Actions options, and then select Trigger. FME Flow will immediately submit the workspace to run as you configured it in the schedule.

Jennifer, a GIS specialist in a city's GIS department, frequently runs a workspace to update Parks data between two databases. Her workspace reads Parks data from a PostGIS database and updates a SQLite database with the data. Jennifer tries to remember to run it daily, but sometimes she forgets. To avoid data inconsistencies and ensure the SQLite database remains consistently up to date, Jennifer will configure this workspace to run on an FME Flow Schedule.
In this exercise, you will:
Jennifer has already published her workspace to FME Flow, ParksDatabaseUpdate.fmw, stored in the Parks Data Updates repository.
This workspace has two user parameters - one for a database connection and one for the SQLite database output location. The workspace writes the SQLite database to the Output folder in FME Flow's Resources Data folder, specified by the $(FME_SHAREDRESOURCE_DATA) parameter.
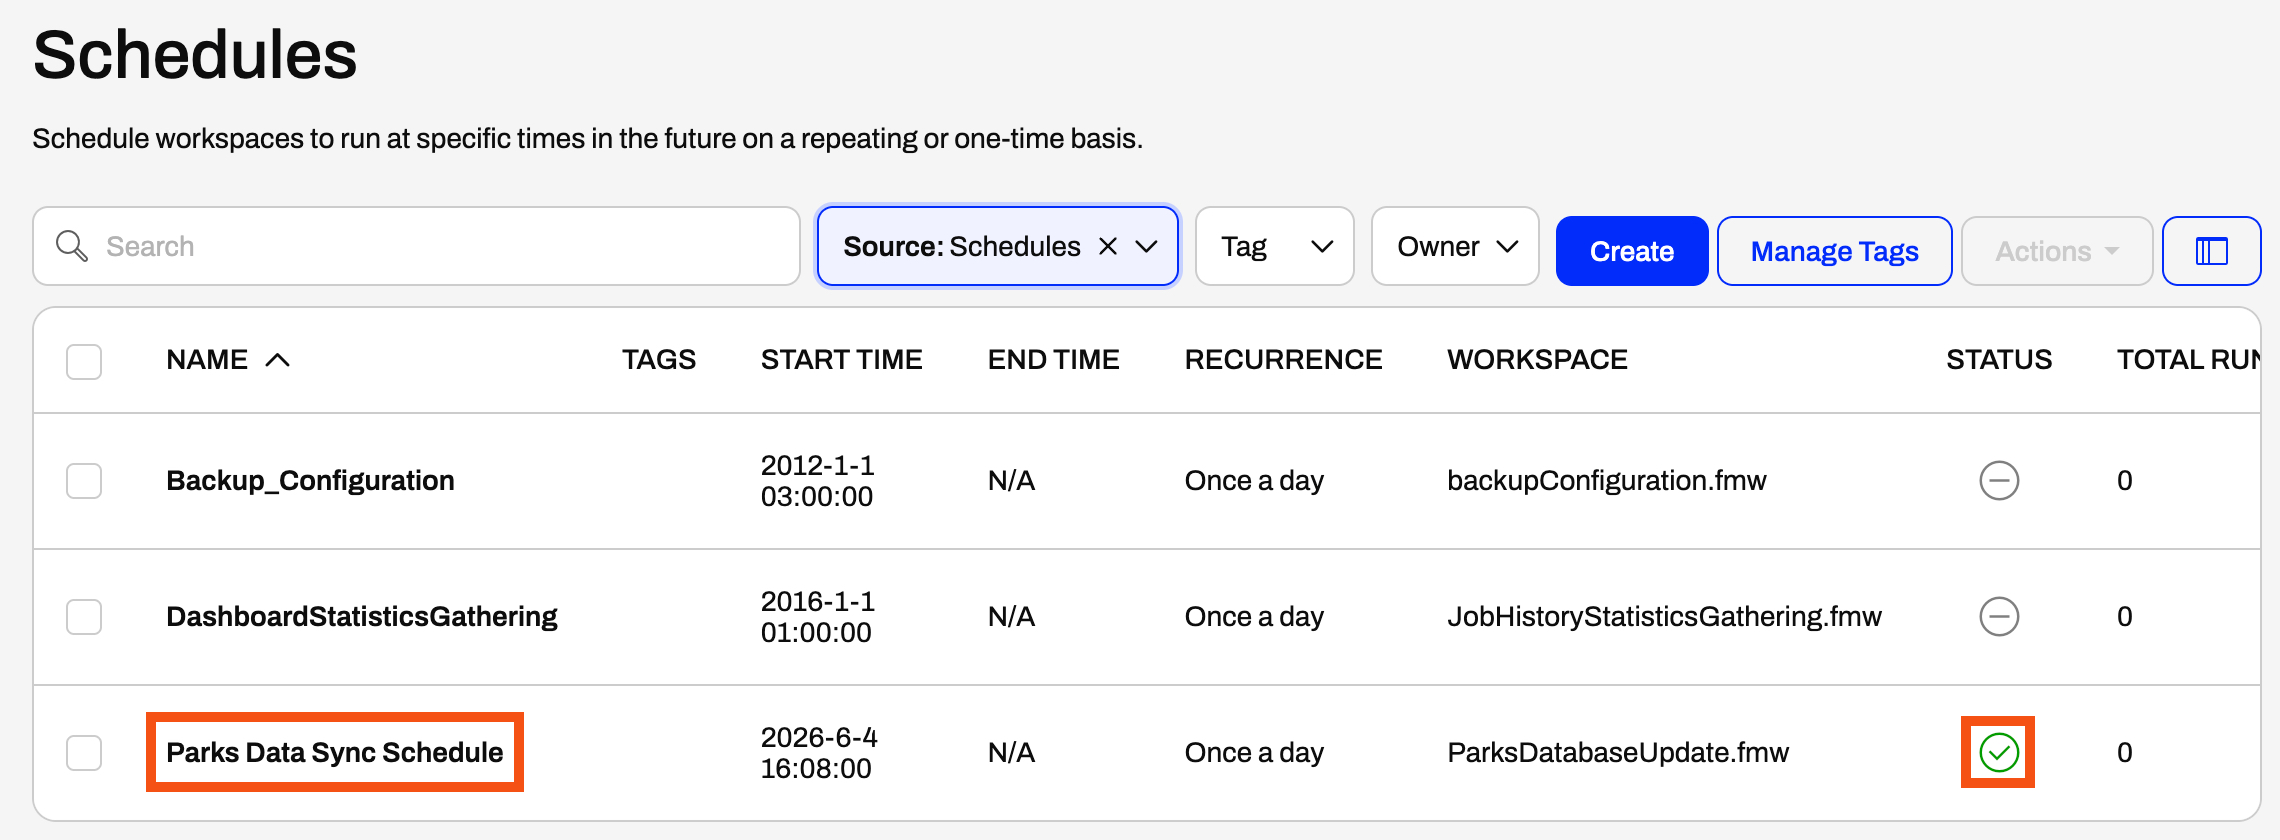
The schedule will run at 8:00 am tomorrow. In the meantime, you should verify that the workspace runs as expected and updates the SQLite database in Resources.
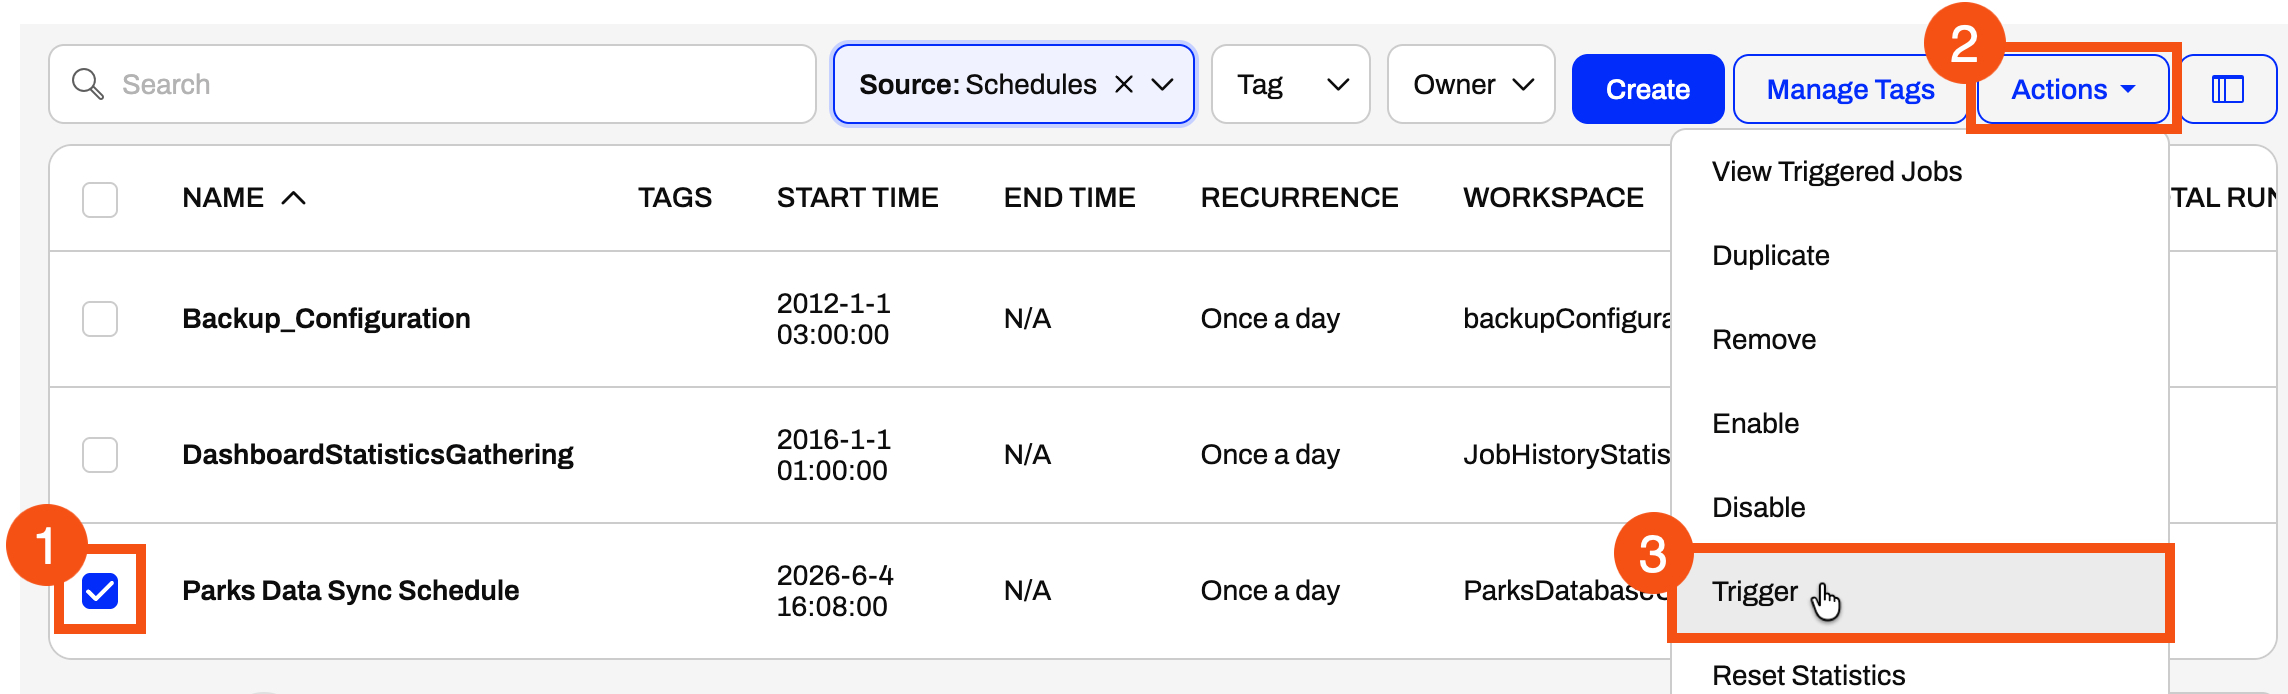
FME Flow triggers the schedule and runs the ParksDatabaseUpdate.fmw.
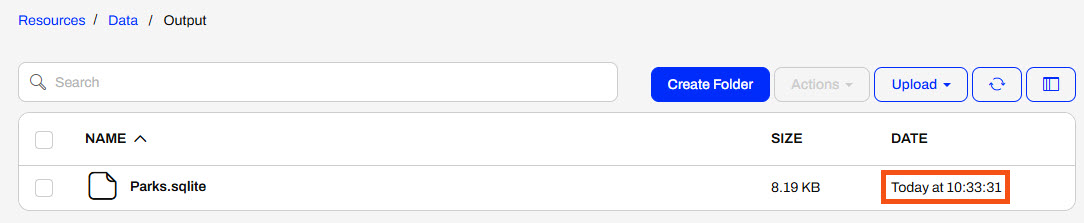
You have successfully created a schedule on FME Flow to run a workspace daily. Automatically running the workspace on a schedule reduces the time Jennifer spends manually running it each day and ensures data consistency across the databases.
If you're taking a live Safe Software-hosted training course or using an on-demand lab for this course, we've already imported the content for this lesson into your FME Flow.
If you're completing this lesson with your own FME Flow, you must import the starting project with the content into your FME Flow.
See FME Flow Authoring: Instructions to Import the Starting Project for directions to import the project to your own FME Flow.
Schedules let you run a workspace on FME Flow at specific future times. You can configure a schedule to run your workspace once at a particular time or repeatedly on an interval. Once you create and enable a schedule, the FME Flow Core ensures that the workspace runs at the correct future time. When a scheduled time occurs, the Core sends the workspace to the FME Flow Engines for processing.
You can run a workspace on a schedule with Automations in FME Flow, which you will learn about in the next lesson. The main advantage of using Automations to create scheduled workflows is the ability to use multiple workspaces and external actions. In contrast, Schedules limit you to running only one workspace and to running it only once in the future.
The Schedules option on the side menu opens a list of Schedules on your FME Flow.
The Create option opens a form where you can choose your workspace to run and set the schedule type and interval.
You must name your schedule and, optionally, provide a description and tags.
The Enabled option determines whether it runs on the schedule you configure as soon as you finish creating it. If you do not select Enabled, FME Flow creates the schedule but will not actively run the workspace until you enable it.
Next, you configure the Schedule Type, which sets when and how often your workspace will run in the future.
There are four different schedule types that you can set for Schedules. Click on each section to learn about each option.
The date range section allows you to define start and end dates and times for FME Flow to run the schedule for all Schedule Types except Only Occur Once. Enter the date and time when the workspace should start running, and optionally enter a date and time when FME Flow will stop running the schedule. You can select Start Immediately to trigger the schedule immediately after you finish creating it. Likewise, you can choose the Does Not Expire option if you want the schedule to continue to run until you manually stop it.
To set the workspace you want to run on the schedule, select the repository that contains the workspace, then select the workspace itself. If the workspace has any User Parameters, a new section will appear to configure the parameter values the workspace should use when it runs. FME Flow automatically selects the Use Default option for the parameters. You may deselect it and configure a different parameter value.
For more information on Parameters, see Build Self-Serve Workflows with Parameters and Create Flexible Workspaces with Parameters.
The last two sections are optional for you to configure. Notifications allow you to select a Topic to which FME Flow sends a message after the workspace translation completes. The Advanced section includes Job Queue control, expiry times, and a Log Debug mode option.
Once you create your schedule, you can view it on the Schedules page.
If you need to edit the schedule, click it on the Schedules page. You can edit all schedule settings except the schedule name.
You may test your schedule before FME Flow triggers it, giving you greater confidence that the workspace will run as expected. From the Manage Schedules page, click the box to select your schedule, expand the Actions options, and then select Trigger. FME Flow will immediately submit the workspace to run as you configured it in the schedule.
Jennifer, a GIS specialist in a city's GIS department, frequently runs a workspace to update Parks data between two databases. Her workspace reads Parks data from a PostGIS database and updates a SQLite database with the data. Jennifer tries to remember to run it daily, but sometimes she forgets. To avoid data inconsistencies and ensure the SQLite database remains consistently up to date, Jennifer will configure this workspace to run on an FME Flow Schedule.
In this exercise, you will:
Jennifer has already published her workspace to FME Flow, ParksDatabaseUpdate.fmw, stored in the Parks Data Updates repository.
This workspace has two user parameters - one for a database connection and one for the SQLite database output location. The workspace writes the SQLite database to the Output folder in FME Flow's Resources Data folder, specified by the $(FME_SHAREDRESOURCE_DATA) parameter.
The schedule will run at 8:00 am tomorrow. In the meantime, you should verify that the workspace runs as expected and updates the SQLite database in Resources.
FME Flow triggers the schedule and runs the ParksDatabaseUpdate.fmw.
You have successfully created a schedule on FME Flow to run a workspace daily. Automatically running the workspace on a schedule reduces the time Jennifer spends manually running it each day and ensures data consistency across the databases.
